How it works
One trip, end to end
From your Premiere Pro project to a ready-to-grade DaVinci Resolve project,
with nothing manually re-imported or re-linked.
1. Open CrossFlow, a standalone Desktop App
CrossFlow is a standalone Desktop app. It requires DaVinci Resolve installed, and only requires Premiere Pro + Media Encoder installed if you want to transcode your files or replace graded files from Resolve.
First open CrossFlow, let “Premiere → Resolve” selected, and choose your .prproj file on disk. If you only need a plain conversion (no Automatic Transcoding or Return to Premiere), Premiere Pro doesn’t even need to be installed on the machine.
Remember to save your Premiere / Resolve projects before launching conversion. If Premiere / Resolve is closed and needs to be open, CrossFlow will do it automatically.
Finally: remember that CrossFlow will not modify your original Premiere / Resolve projects. It only creates a copy or fresh new project.
2. Choose what gets transcoded / converted
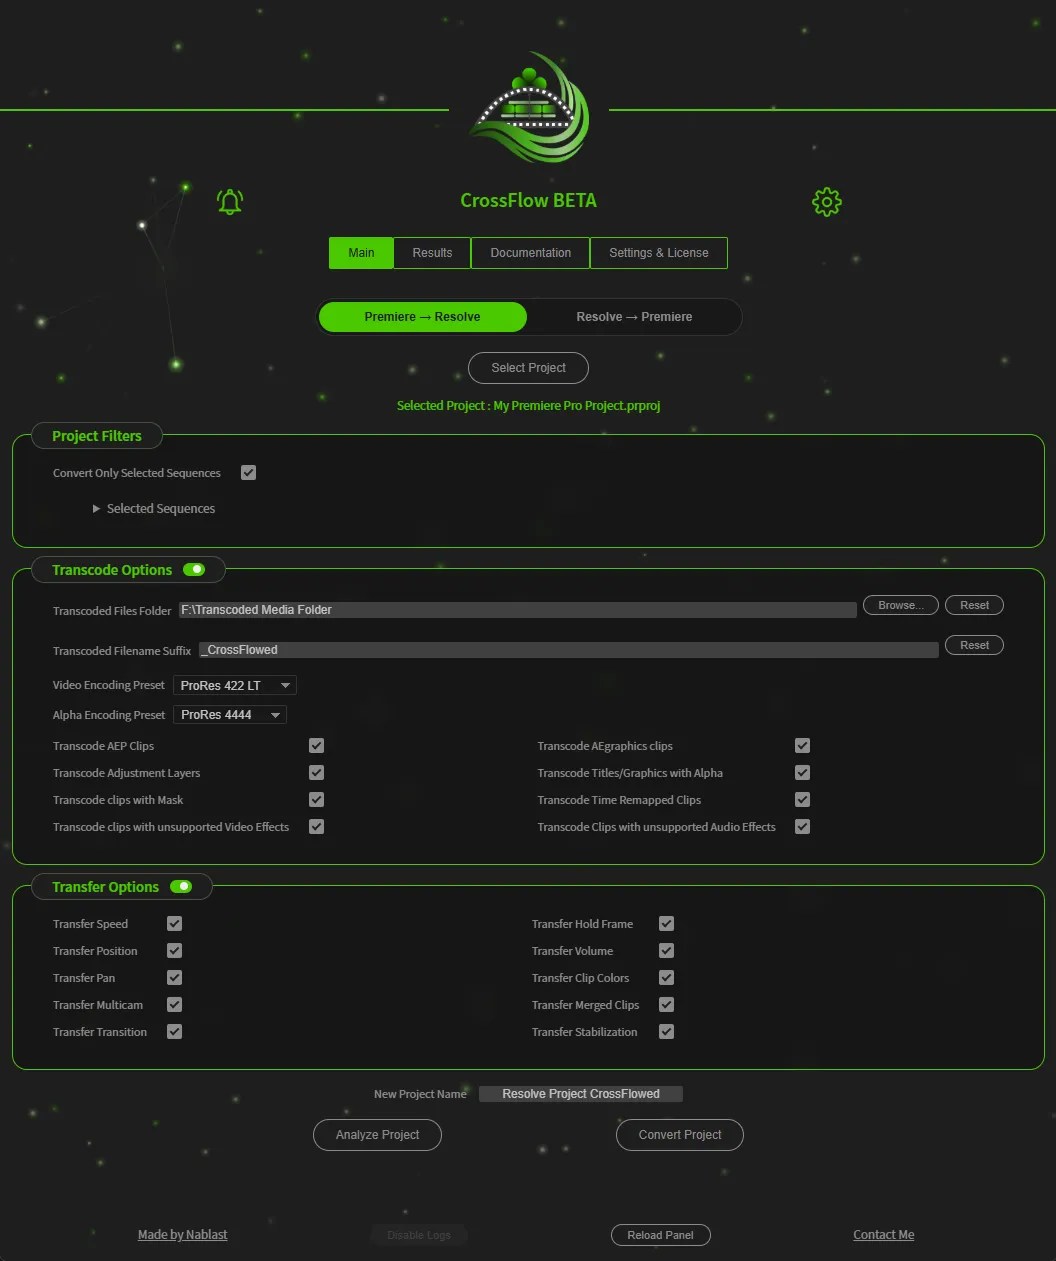
Three option groups control the conversion:
- Project Filters: to filter the Premiere Project before processing. You can select the sequences you want to keep and it will keep them recursively (nested sequences will be taken account automatically).
- Transcode Options: to choose which unsupported items will be transcoded, and decide of which transcode preset will be used: All ProRes profiles, H264 Fixed or Adaptive Bitrate, .. (tell me if you need others !)
- Transfer Options: to choose which native properties: speed, position, multicam, stabilization, … get carried across. Sensible defaults are on from the start; you only need to touch these if your project needs something specific or to debug an issue.
3. Analyze before you convert (optional)
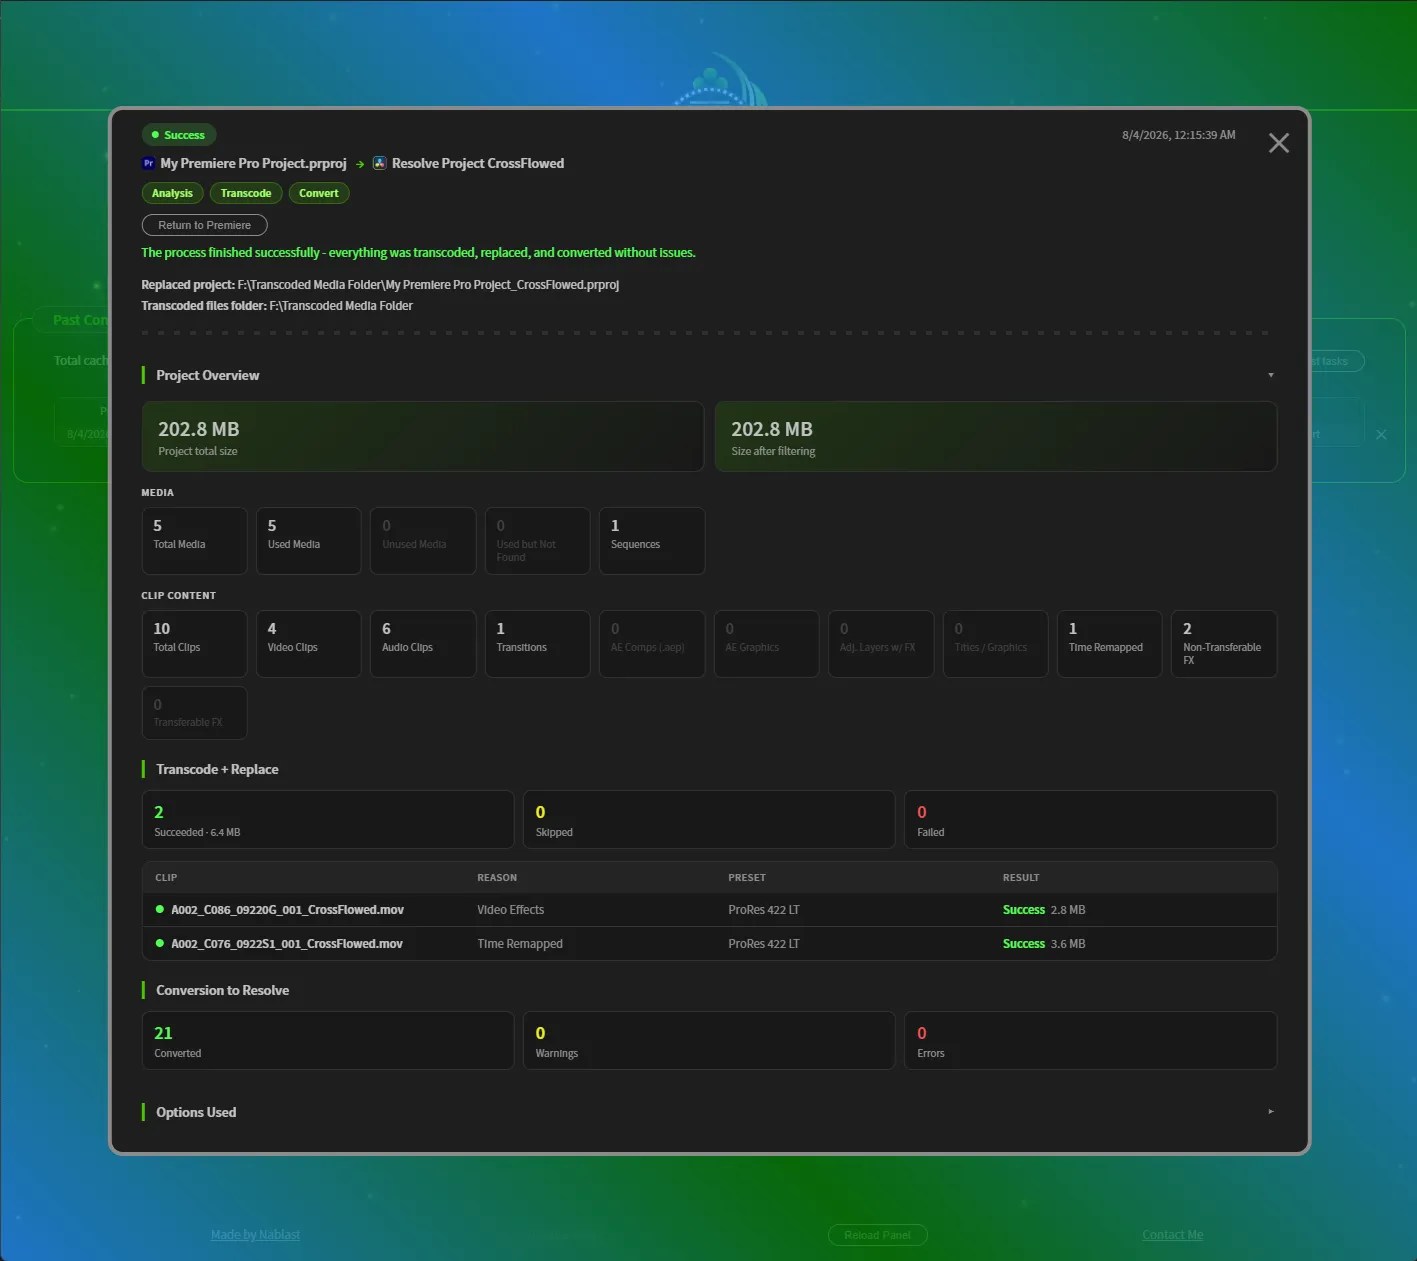
Click “Analyze Project” to see what CrossFlow would do with your current options, without touching Resolve, Premiere or Media Encoder. You get a project overview, an estimate of which clips would be transcoded and why, an estimation of the new total transcoded file size and which clips would import cleanly versus with reduced fidelity or not at all.
It’s a preview, not a guarantee (some things can only be confirmed by the real conversion) but it catches most surprises early.
4. Convert
CrossFlow renders whatever needs transcoding through Adobe Media Encoder, then writes the whole project directly into DaVinci Resolve’s own project: bins, sequences, markers, transitions, effects, and the transcoded clips.
There’s no intermediate file for you to import: open Resolve and the project is already there, organized the way it was in Premiere.
If you set your Premiere colors in the same way than Resolve (can be done in one click inside CrossFlow), you will even get the same exact clip colors.
5. Review exactly what happened
Every conversion is saved in the Results tab, with a full per-clip breakdown of what was converted, transcoded, or flagged, plus the exact options used. You can come back to it later — even after closing and reopening CrossFlow.
6. Grade in Resolve, then bring it back (optional)
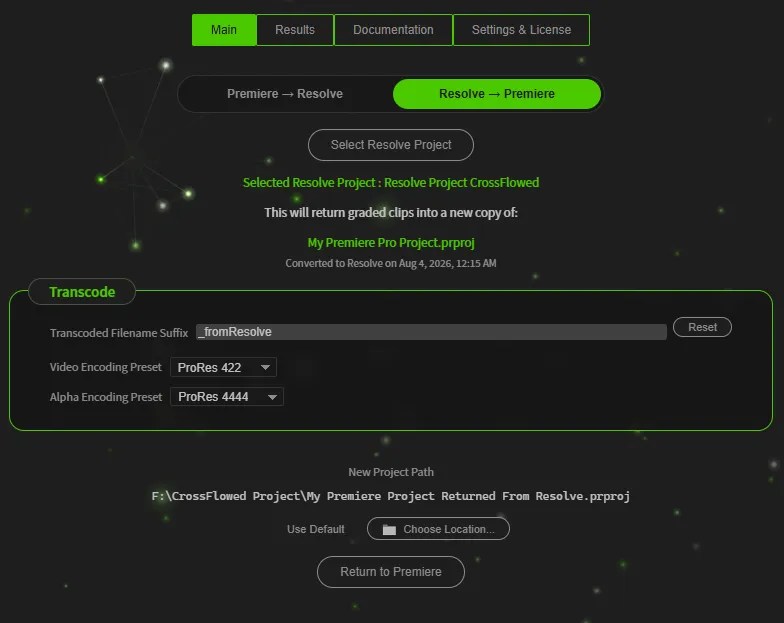
Once you’ve applied at least one Color Node to a clip in Resolve, use “Return to Premiere” on that conversion from the Results tab. CrossFlow detects every graded clip, exports it out of Resolve, and builds a new Premiere Pro project, copied from the original, with the graded shots already dropped in. No manual re-importing or re-placing.